Introduction
GridDB combines the horizontal scalability of a distributed key-value store with the queryability of a relational database, making it ideal for automation workloads. In this guide, we show how to pair GridDB with n8n to create a simple Pokémon API service with minimal code.
We’ll set up a local n8n environment, connect it to GridDB, and build a reusable workflow so you can adapt it for another application. Whether you’re experimenting with AI-assisted operations or building production-ready automations, the steps below will help you get started quickly and confidently.
What will we build?
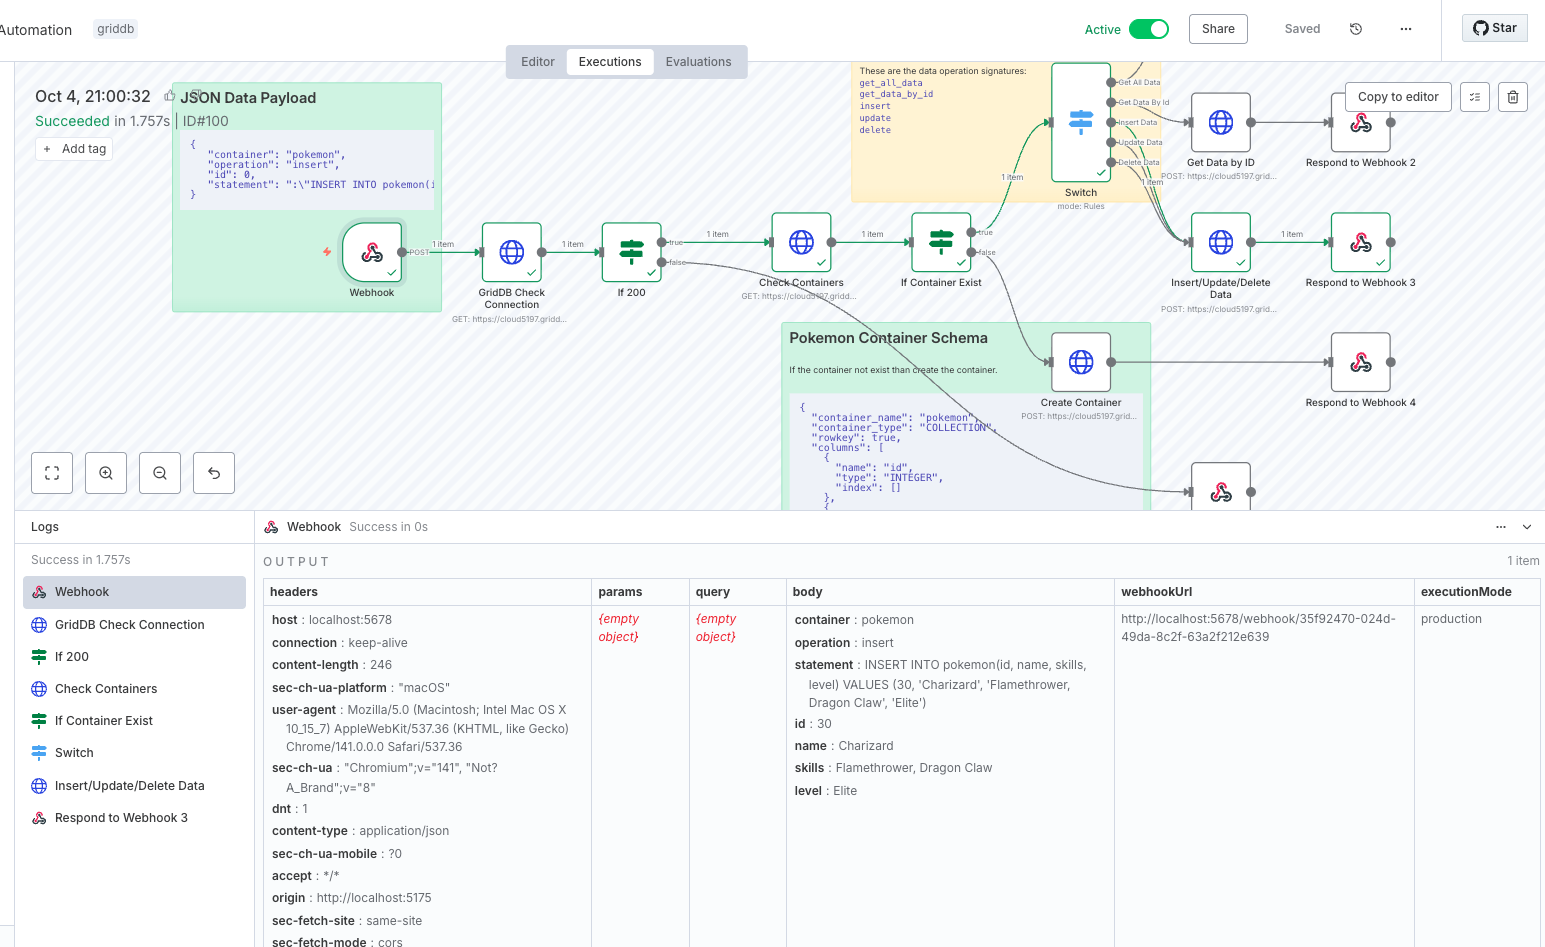
In this project, we will build a Pokémon API service using n8n automation.
Why n8n?
n8n is a workflow automation platform that provides technical teams with the flexibility of code and the speed of no-code. Its core is source-available under the Sustainable Use License, which allows you to view, use, and modify the code, but it also imposes business restrictions. However, for our use case, the community edition is more than enough for development.
How to run the project
You need n8n installed on your system. Please look into this section for the n8n installation.
1. Download the n8n workflow from the repository
The n8n workflow file can be downloaded from here.
2. Import the workflow into the n8n dashboard
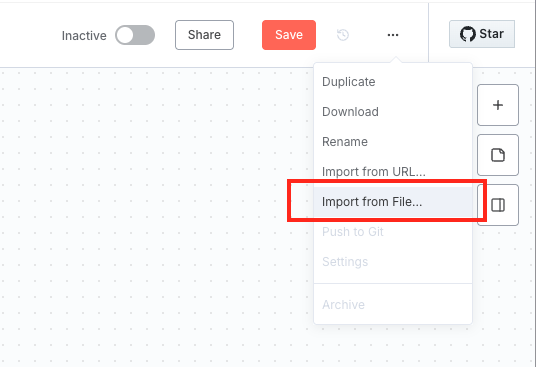
Open the n8n workspace, create a new workflow, and then import the downloaded n8n workflow file.
3. Set up the GridDB credentials
In n8n community edition, you can use the Credentials feature, but it’s still not supported base64 cred encoding, so in our project, we need to set the credentials manually for each HTTP Request.
Here are the n8n nodes you need to set:
- GridDB Check Connection
- Check Containers
- Create Container
- Get All Data
- Insert/Update/Delete Data
- Get Data by ID
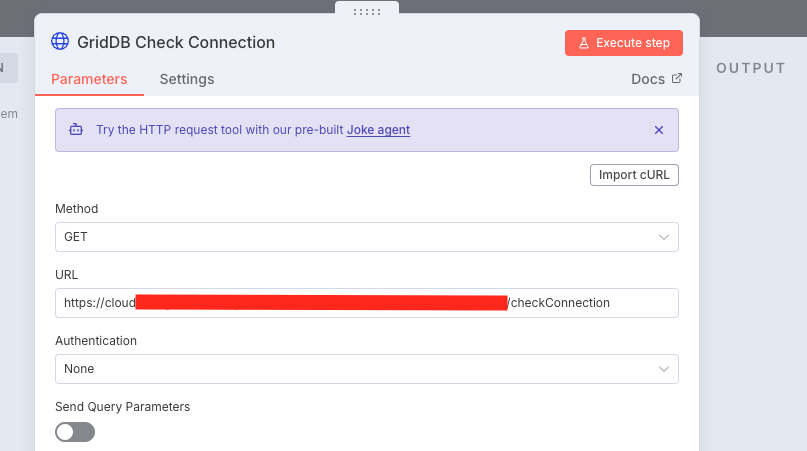
Double-click the node and then replace the value after Basic with your base64 encoding of username and password.
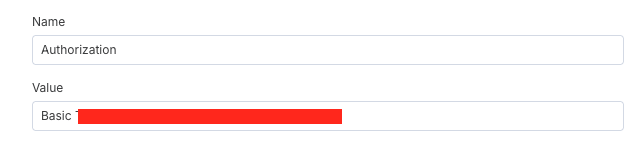
In Mac or Linux, you can use this command to encode username and password using base64 encoding:
$ echo -n 'username:password' | base64Other than credentials, you also need to change the GridDB Cloud URL in each HTTP Request nodes.
To test the workflow, you can run the tests command from this section.
Prerequisites
Node.js
The project sample in this article is using Node.js. Make sure to install the latest Node.js LTS version on your machine.
GridDB
Sign Up for GridDB Cloud Free Plan
If you would like to sign up for a GridDB Cloud Free instance, you can do so at the following link: https://form.ict-toshiba.jp/download_form_griddb_cloud_freeplan_e.
After successfully signing up, you will receive a free instance along with the necessary details to access the GridDB Cloud Management GUI, including the GridDB Cloud Portal URL, Contract ID, Login, and Password.
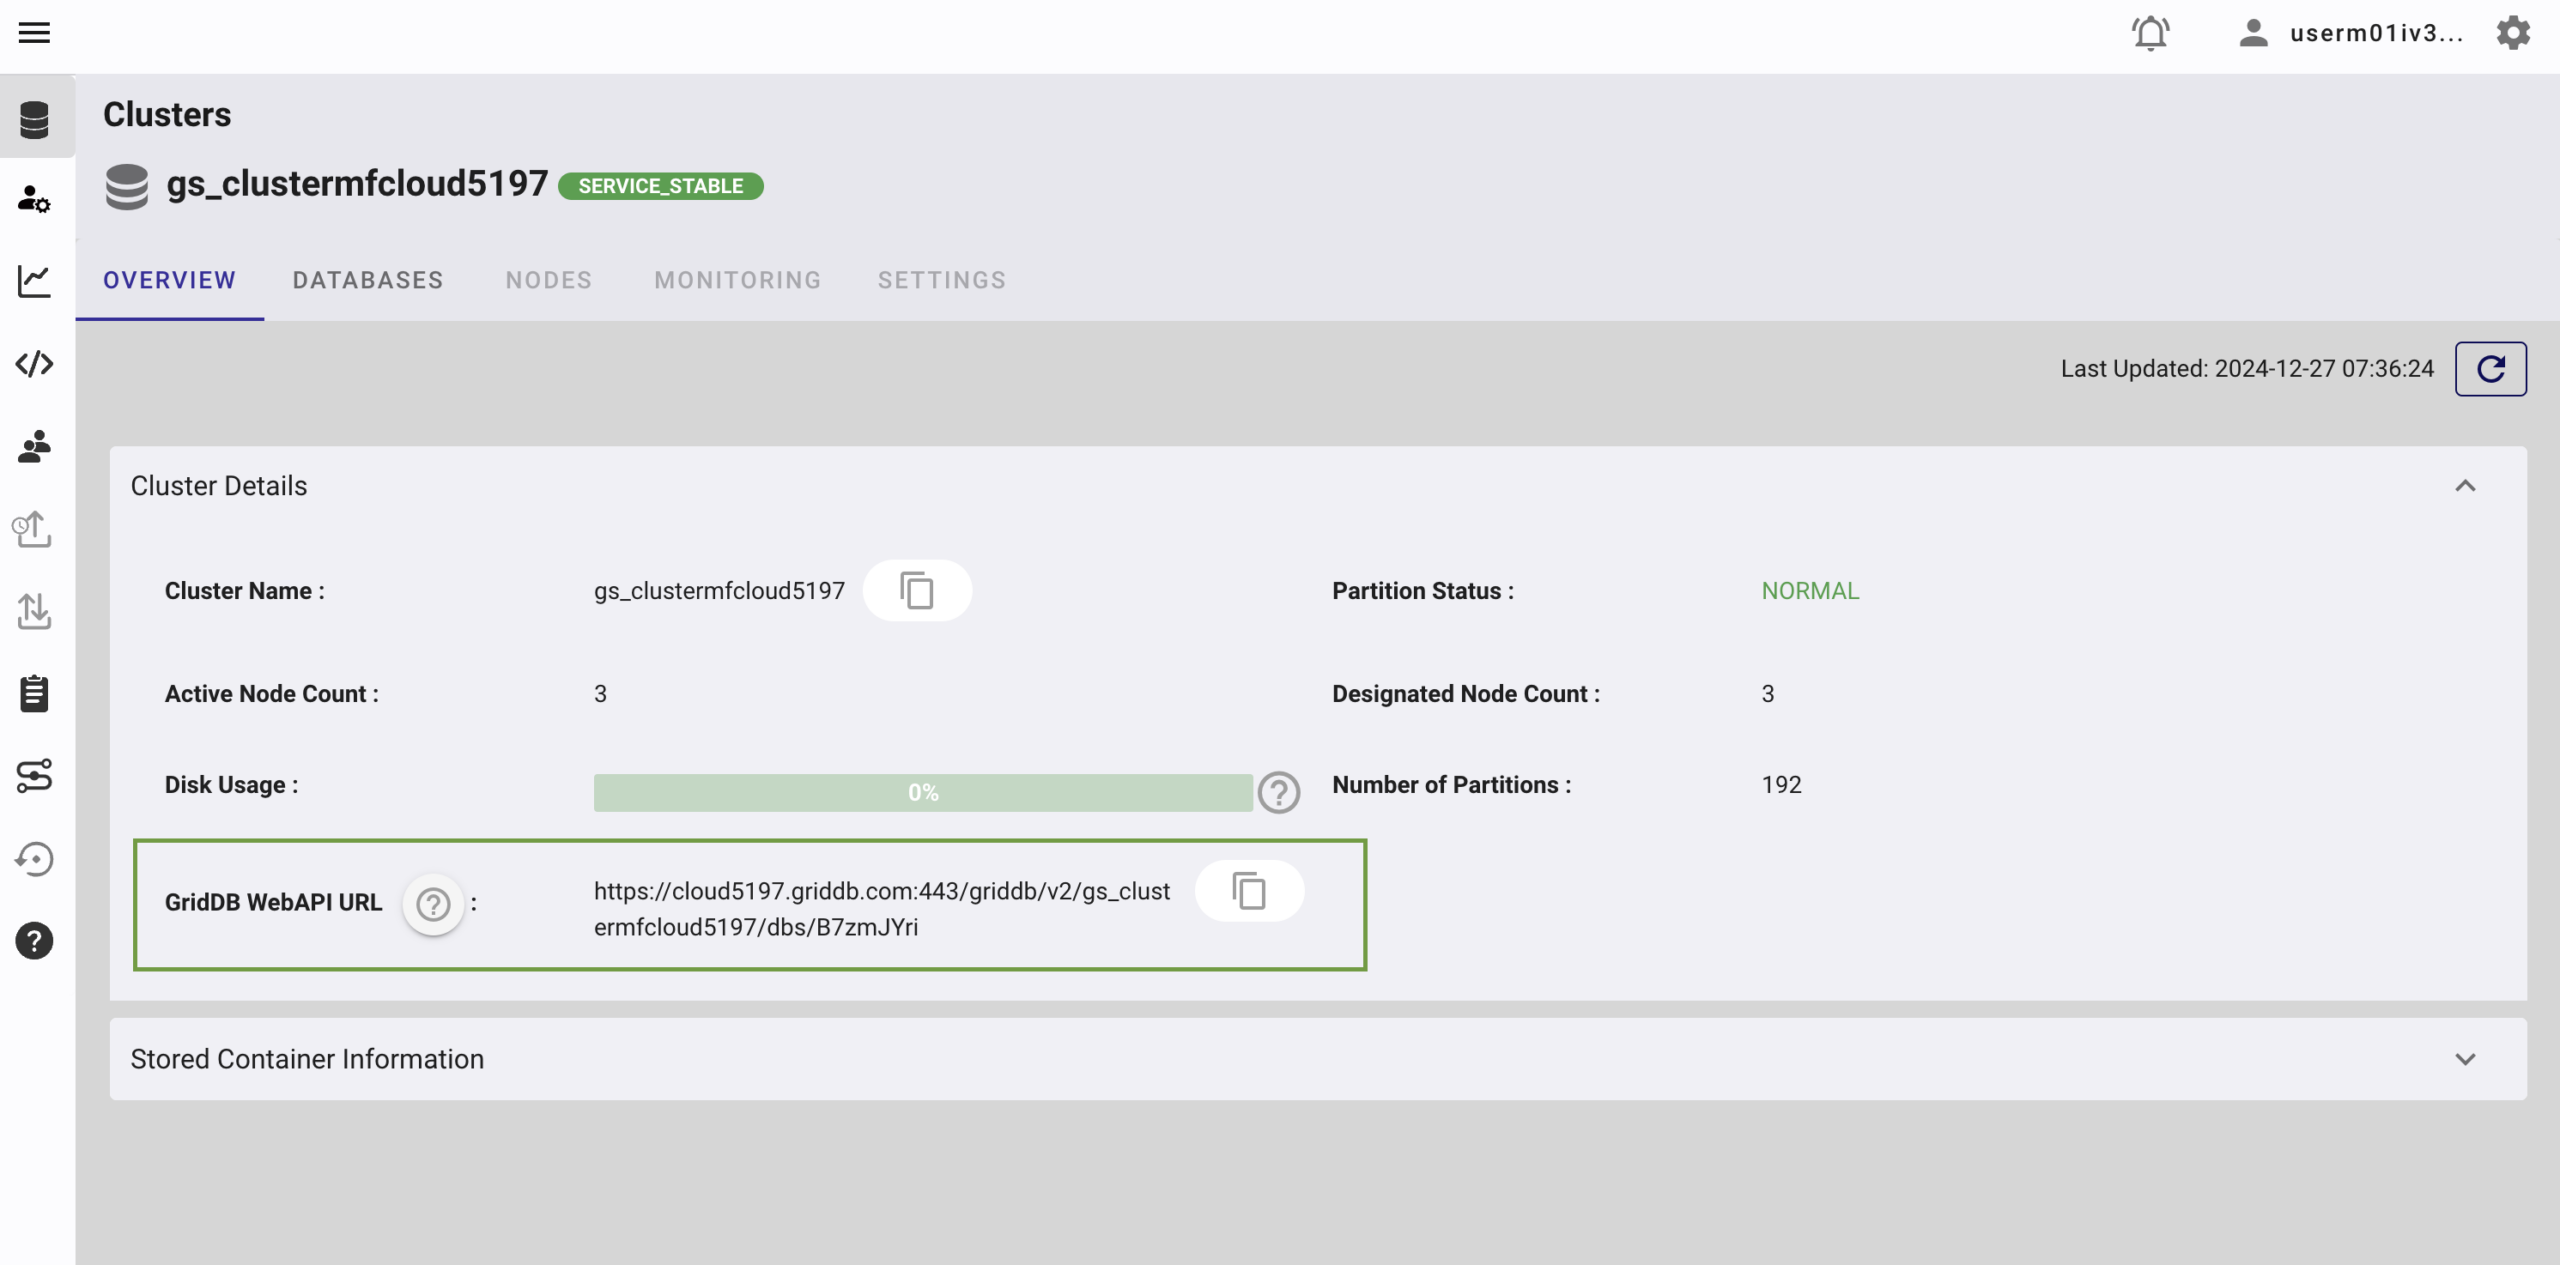
GridDB WebAPI URL
Go to the GridDB Cloud Portal and copy the WebAPI URL from the Clusters section. It should look like this:
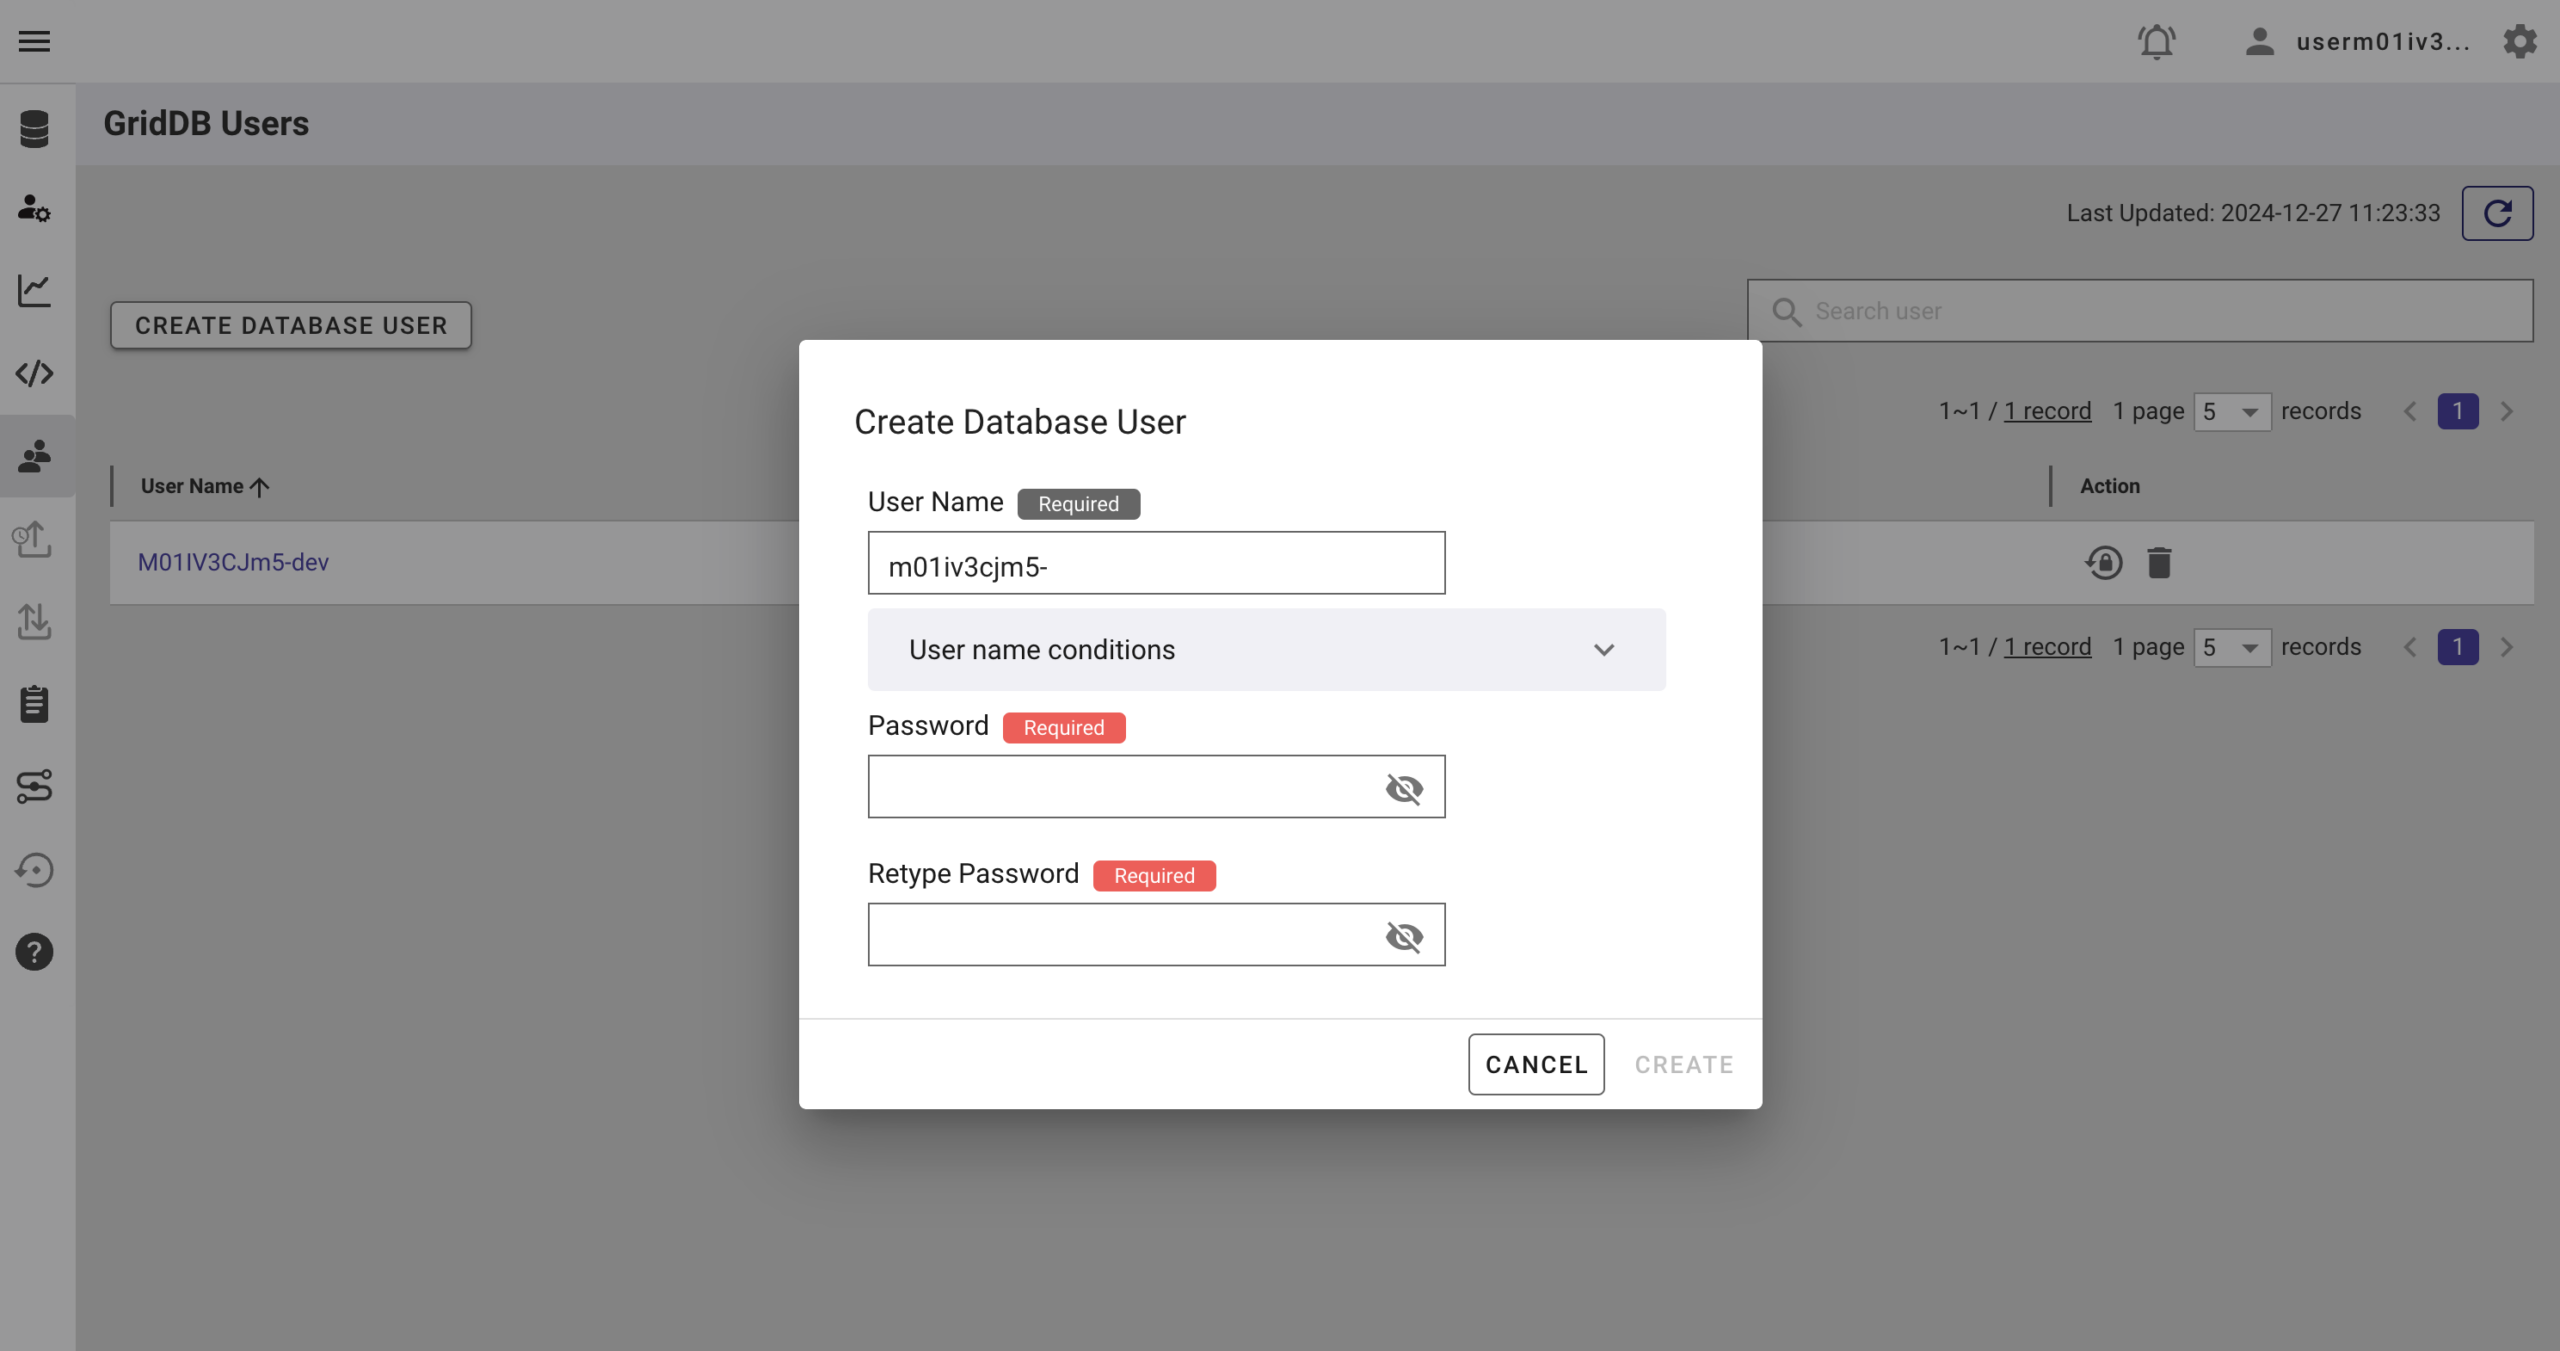
GridDB Username and Password
Go to the GridDB Users section of the GridDB Cloud portal and create or copy the username. The password is set when the user is created for the first time. Use this as the password.
For more details, to get started with GridDB Cloud, please follow this quick start guide.
IP Whitelist
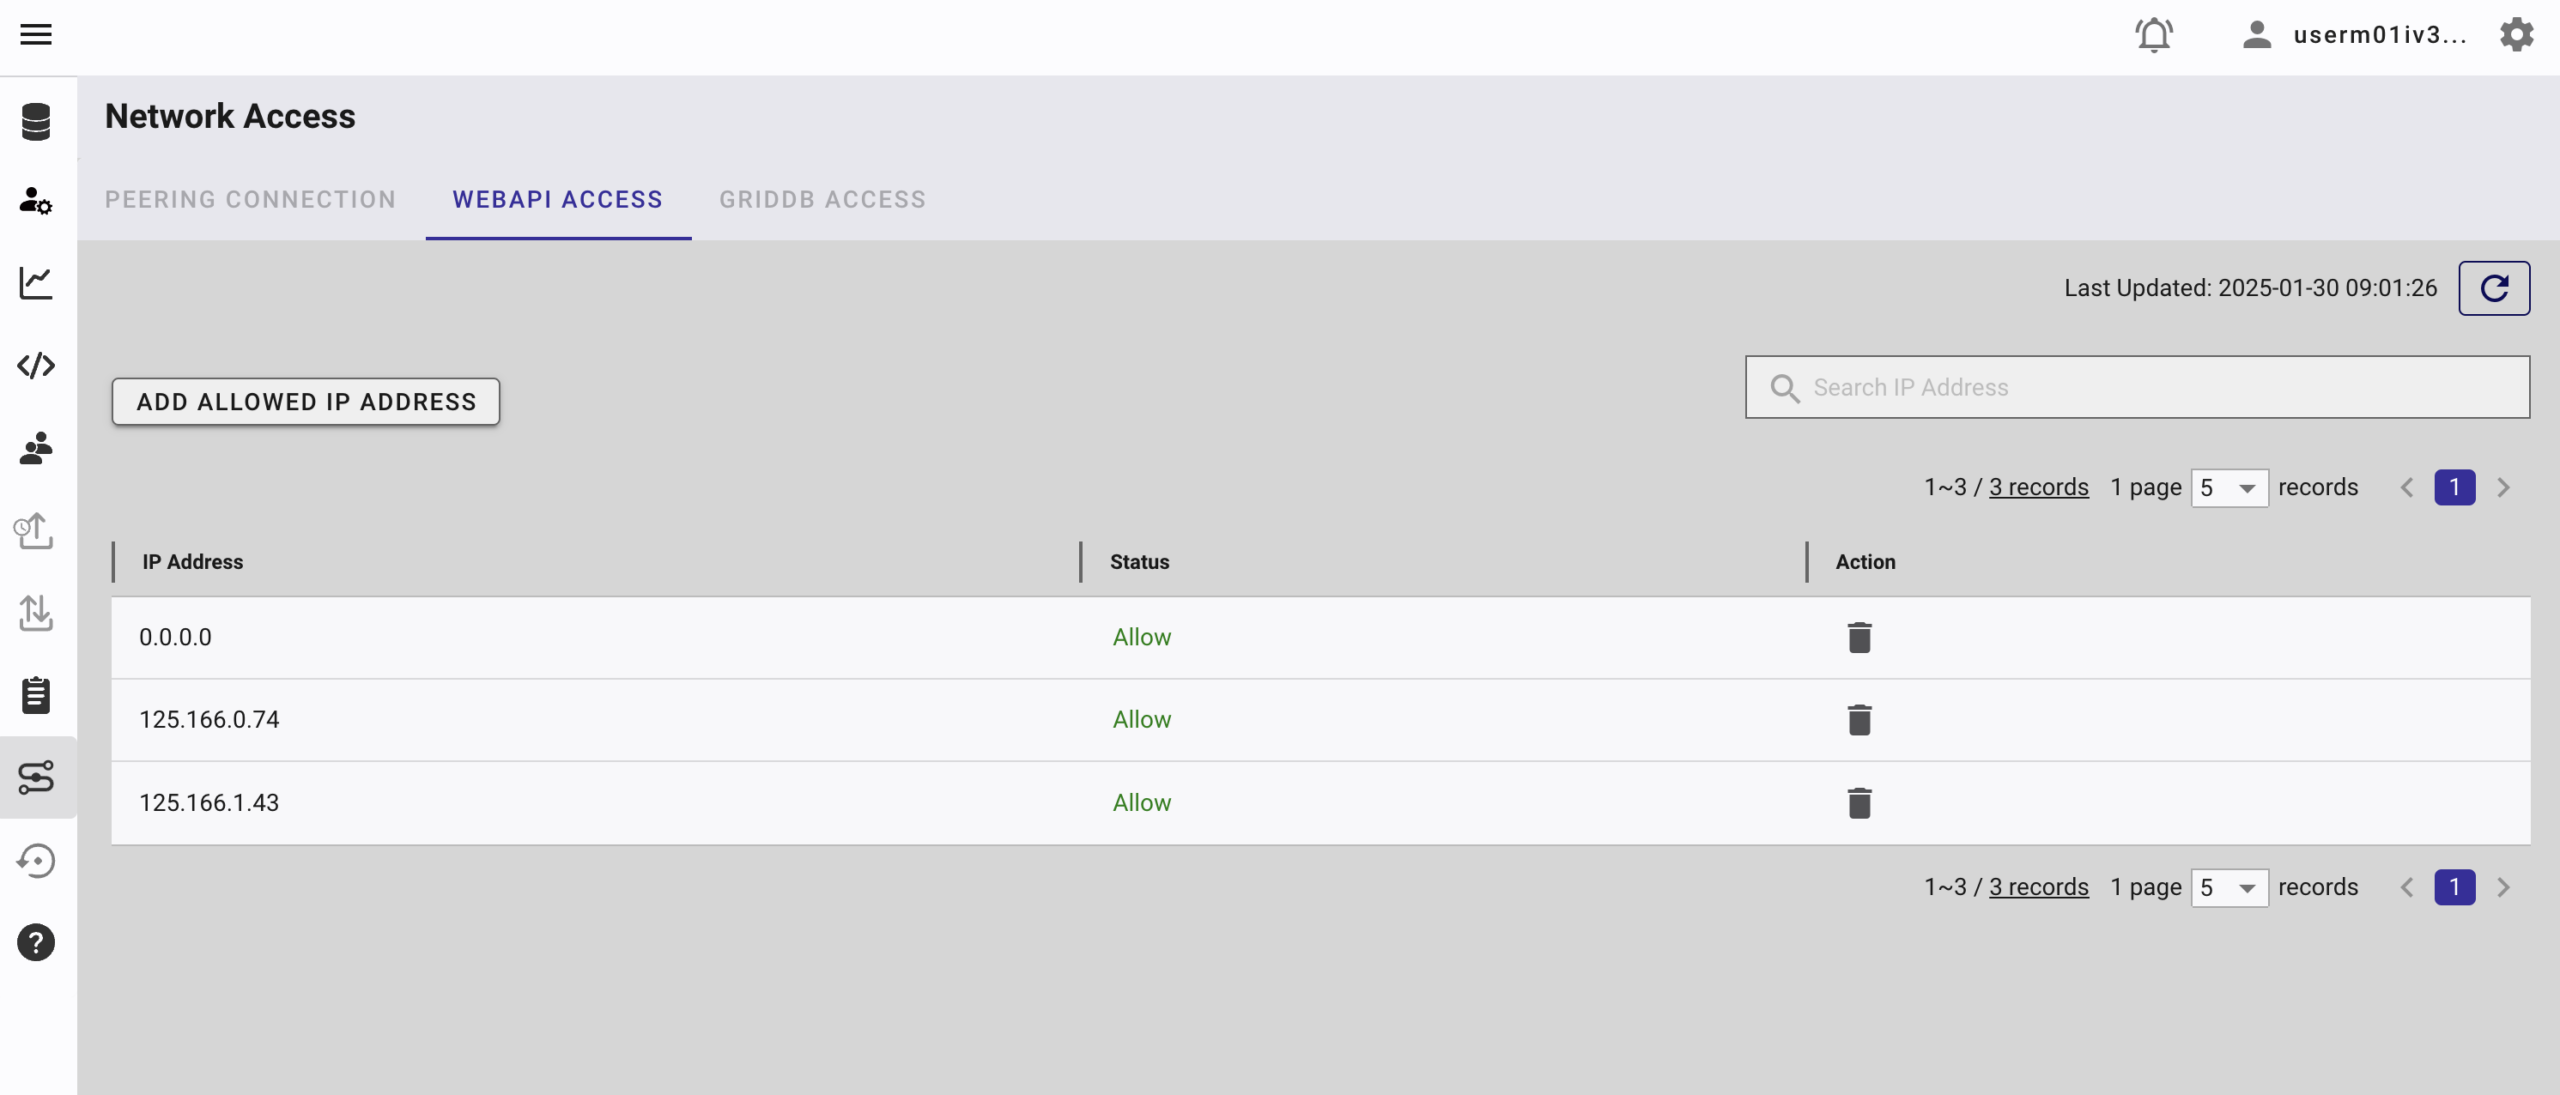
When running this project, please ensure that the IP address where the project is running is whitelisted. Failure to do so will result in a 403 status code or forbidden access.
You can use a website like What Is My IP Address to find your public IP address.
To whitelist the IP, go to the GridDB Cloud Admin and navigate to the Network Access menu.
Install n8n on Local Machine
You need to run an n8n instance to try the automation workflow. The n8n can be hosted on the cloud or locally. For this article, we will install the n8n community edition locally.
To install it, follow these steps:
1. Clone the source code
Go to the n8n GitHub repository and then clone it. Currently, the latest release version of n8n is 1.113.3.
$ git clone --branch 1.113.3 https://github.com/n8n-io/n8n.git2. Install deps
The n8n basically is a runnable npm package, and it needs pnpm to build and run.
$ cd n8n
$ pnpm install
3. Build and run
It’s better to build the n8n first so you will run much faster if you want to run it again at other times.
pnpm build
pnpm run dev
Once the n8n is running, by default, you can access it in the URL http://localhost:5678.
If you want to deploy it to the cloud and expose it to the public, there are a few environment variable settings that will override the n8n default settings. Please read their official documentation for deployment for more information.
Project
Before we dig deeper into the app project, it’s valuable to know what main operations we will use in this n8n automation related to access to the GridDB database.
Setup GridDB Connection
This n8n workflow will check the connection to the GridDB database. It will respond with a 200 HTTP status code if the connection is successful.
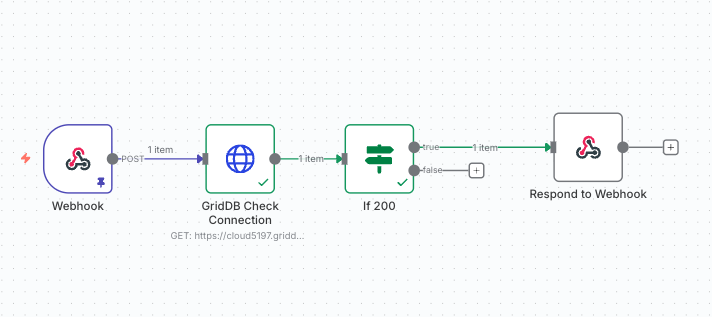
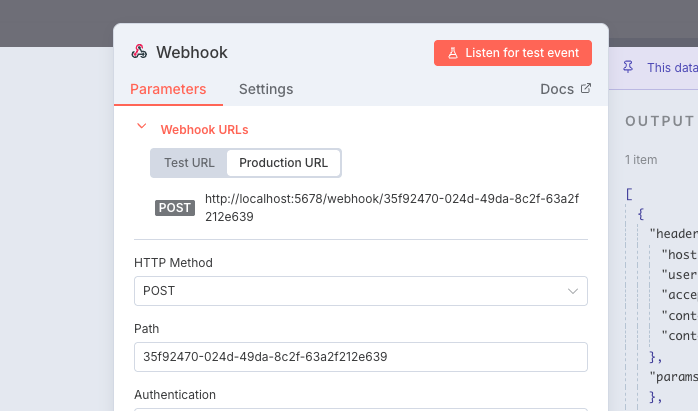
The Webhook node is the entry node for automation. In this node, we can set the HTTP operation and authentication. It also gives us a test and production address where the client can access it publicly. For our project, this will be local. For example:
$ http://localhost:5678/webhook/35f92470-024d-49da-8c2f-63a2f212e639
The GridDB Check Connection node basically is a GET HTTP call to the GridDB Cloud, another form of this curl command:
$ curl -i --location --request GET 'https://cloud5197.griddb.com:443/griddb/v2/cluster-name/dbs/db-name/checkConnection' --header 'Authorization: Basic base64(username:password)'For real production, replace the GridDB cloud address and make sure to encode the username and password into the base64 encoding.
Check containers
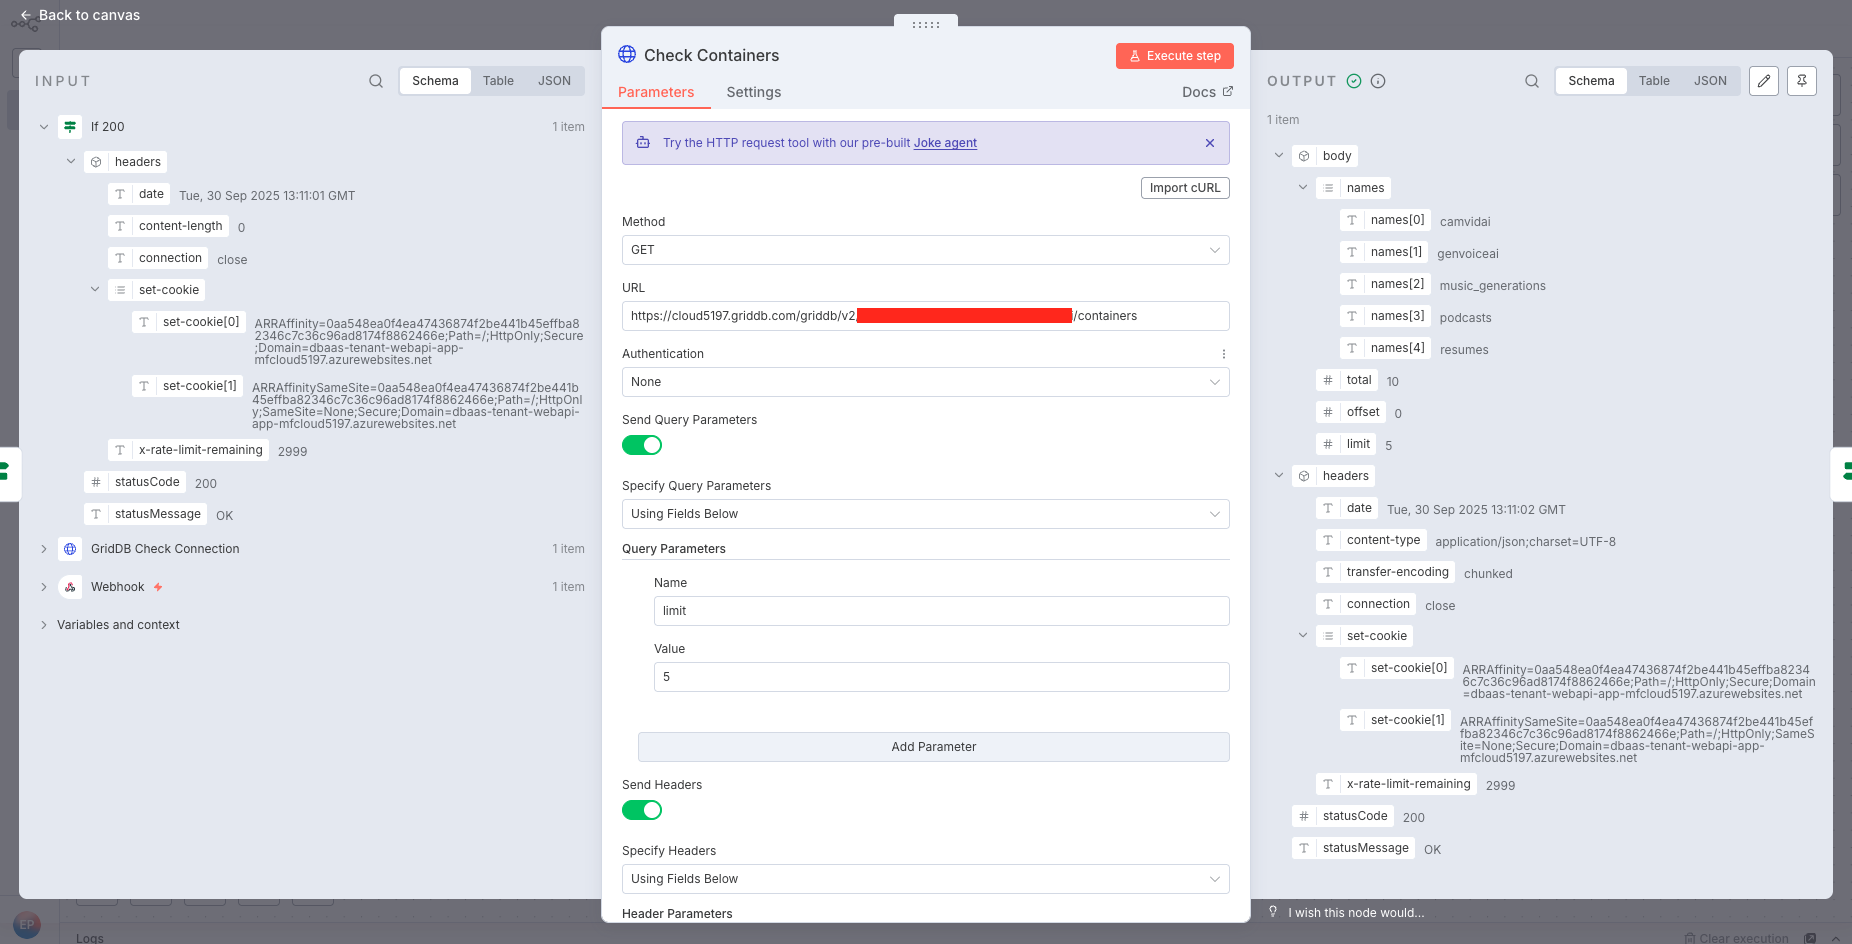
The basic curl command to check the existing containers in GridDB is as follows:
$ curl -i --location --request GET 'https://cloud5197.griddb.com:443/griddb/v2/cluster-name/dbs/db-name/containers?limit=100' --header 'Authorization:Basic base64(username:password)' --header 'Content-Type: application/jsonThe above command can be converted to n8n automation very easily by using the HTTP Request node (using the import cURL button).
Create containers
To create a new container, we can use curl directly as long as we have the right credentials. Ok, now let’s create a container named “pokemon”:
$ curl -i --location --request POST \
$  'https://cloud5197.griddb.com:443/griddb/v2/cluster-name/dbs/db-name/containers' \
$     --header 'Authorization: Basic base64(username:password)' \
$     --header 'Content-Type: application/json' \
$     --data '{
$  "container_name": "pokemon",
$  "container_type": "COLLECTION",
$  "rowkey": true,
$  "columns": [
$          {"name": "id", "type": "INTEGER", "index": []},
$          {"name": "name", "type": "STRING", "index": []},
$          {"name": "skills", "type": "STRING", "index": []},
$          {"name": "level", "type": "STRING", "index": []}
$      ]
$  }'
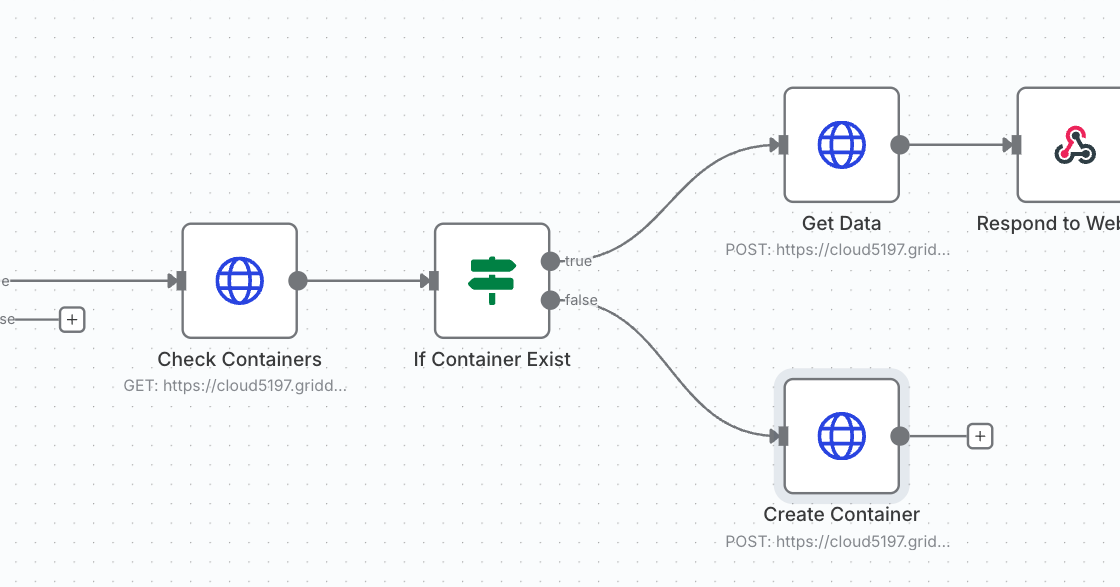
In the n8n automation workflow, we can put the node after checking the existing container, and if it doesn’t exist, then we can create it.
Get all data
To get data from a known container, we can use this curl command to get all data:
$ curl -i --location --request POST 'https://cloud5197.griddb.com:443/griddb/v2/cluster-name/dbs/db-name/tql/' --header 'Authorization: Basic base64(username:password)' --header 'Content-Type: application/json' --data '[{"name":"pokemon","stmt":"select * limit 10","columns":null,"hasPartialExecution":true}]'
The command uses TQL to select all data from GridDB pokemon container. As with the other operations, the read data can also be easily implemented in the n8n using the HTTP Request node.
Get Specific Data
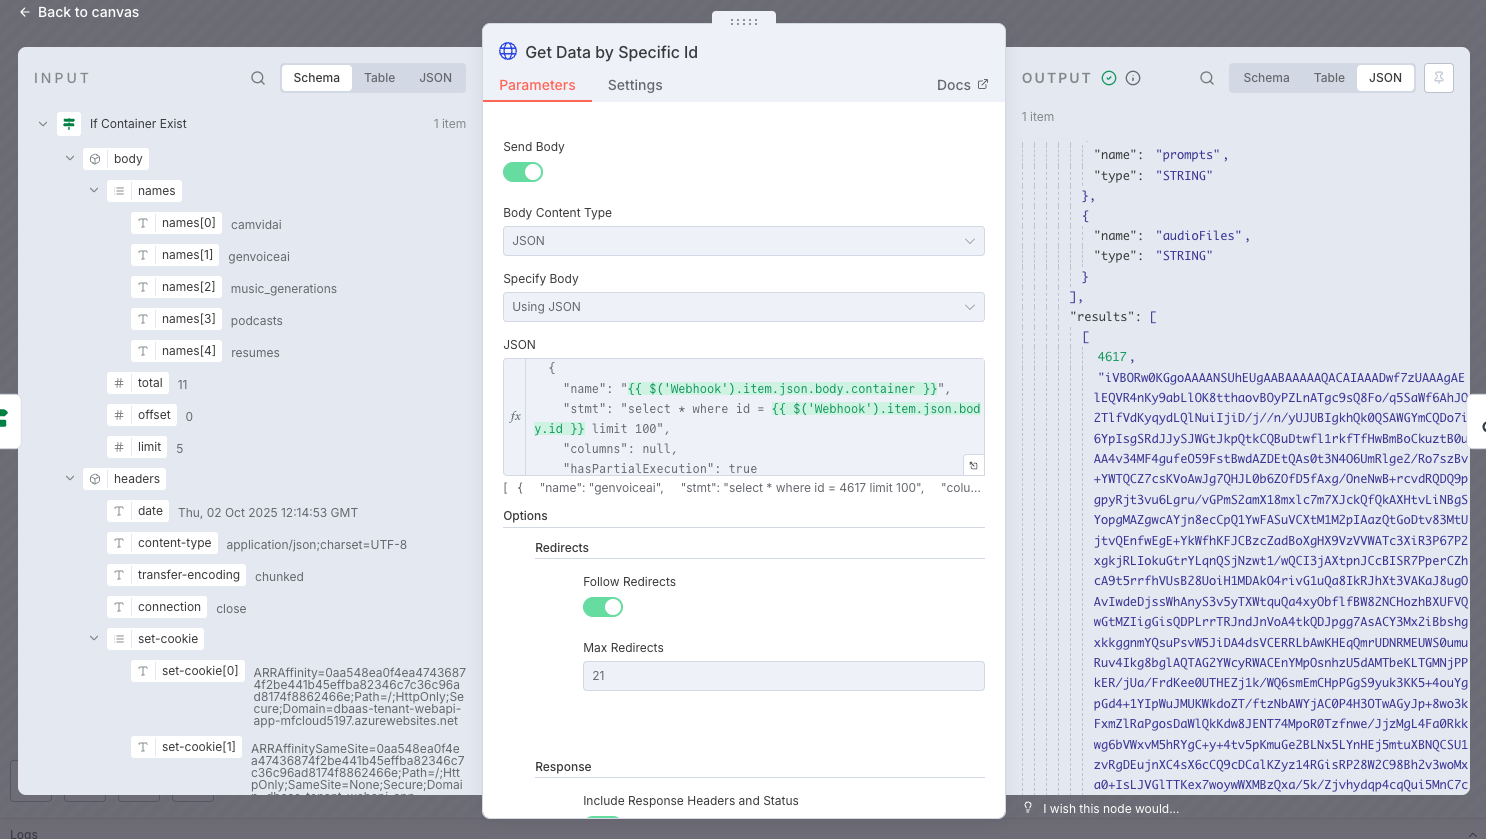
To get specific data from the GridDB database, for example, by its ID, you can use this curl command:
$ curl -i --location --request POST \
$  'https://cloud5197.griddb.com:443/griddb/v2/cluster-name/dbs/db-name/tql/' \
$       --header 'Authorization: Basic base64(username:password)' \
$       --header 'Content-Type: application/json' \
$       --data '[{"name":"pokemon","stmt":"select * where id = 4167 limit 100","columns":null,"hasPartialExecution":true}]'
In n8n, the curl can also be easily converted into the n8n node using the HTTP Request node.
Insert, Update, and Delete data
There are a few ways to insert data in GridDB using web API endpoints:
/sql/dml/update: accepts any SQL DML (INSERT/UPDATE/DELETE)./tql/: processes TQL statements, including PUT (…) for row upserts and SELECT queries./containers/: writes raw row arrays directly. Ideal for bulk inserts, and you must send values in column order./rows
We will use the /sql/dml/update in this n8n automation because we will support 3 data operations, which are: INSERT, UPDATE, and DELETE.
Insert
$ curl -i --location --request POST 'https://cloud5197.griddb.com:443/griddb/v2/cluster-name/dbs/db-name/sql/dml/update' --header 'Authorization: Basic base64(username:password)' --header 'Content-Type: application/json' --data "[{\"stmt\":\"INSERT INTO pokemon(id, name, skills, level) VALUES (26, 'Charmander', 'Flamethrower,Dragon Breath', 'Starter')\"}]"Update
$ curl -i --location --request POST 'https://cloud5197.griddb.com:443/griddb/v2/cluster-name/dbs/db-name/sql/dml/update' --header 'Authorization: Basic base64(username:password)' --header 'Content-Type: application/json' --data "[{\"stmt\":\"UPDATE pokemon SET level = 'Master' WHERE id = 25\"}]"Delete
$ curl -i --location --request POST 'https://cloud5197.griddb.com:443/griddb/v2/cluster-name/dbs/db-name/sql/dml/update' --header 'Authorization: Basic base64(username:password)' --header 'Content-Type: application/json' --data "[{\"stmt\":\"DELETE FROM pokemon WHERE id = 26\"}]"
From all the curl commands above, each can be easily converted into the n8n node using the HTTP Request node, or we can use just one n8n node and make the stmt a variable.
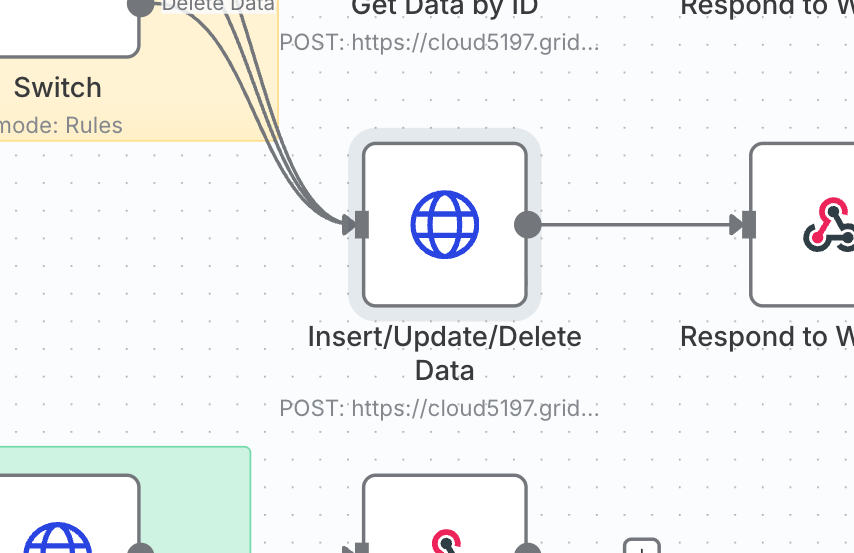
Shouldn’t there be three nodes?
It’s not necessary because the only changing part in the command is the SQL statement, and the other parts are pretty much the same.
So, for the user to be able to insert, update, or delete data, the user or client needs to send a SQL statement in the payload data.
Full n8n Workflow
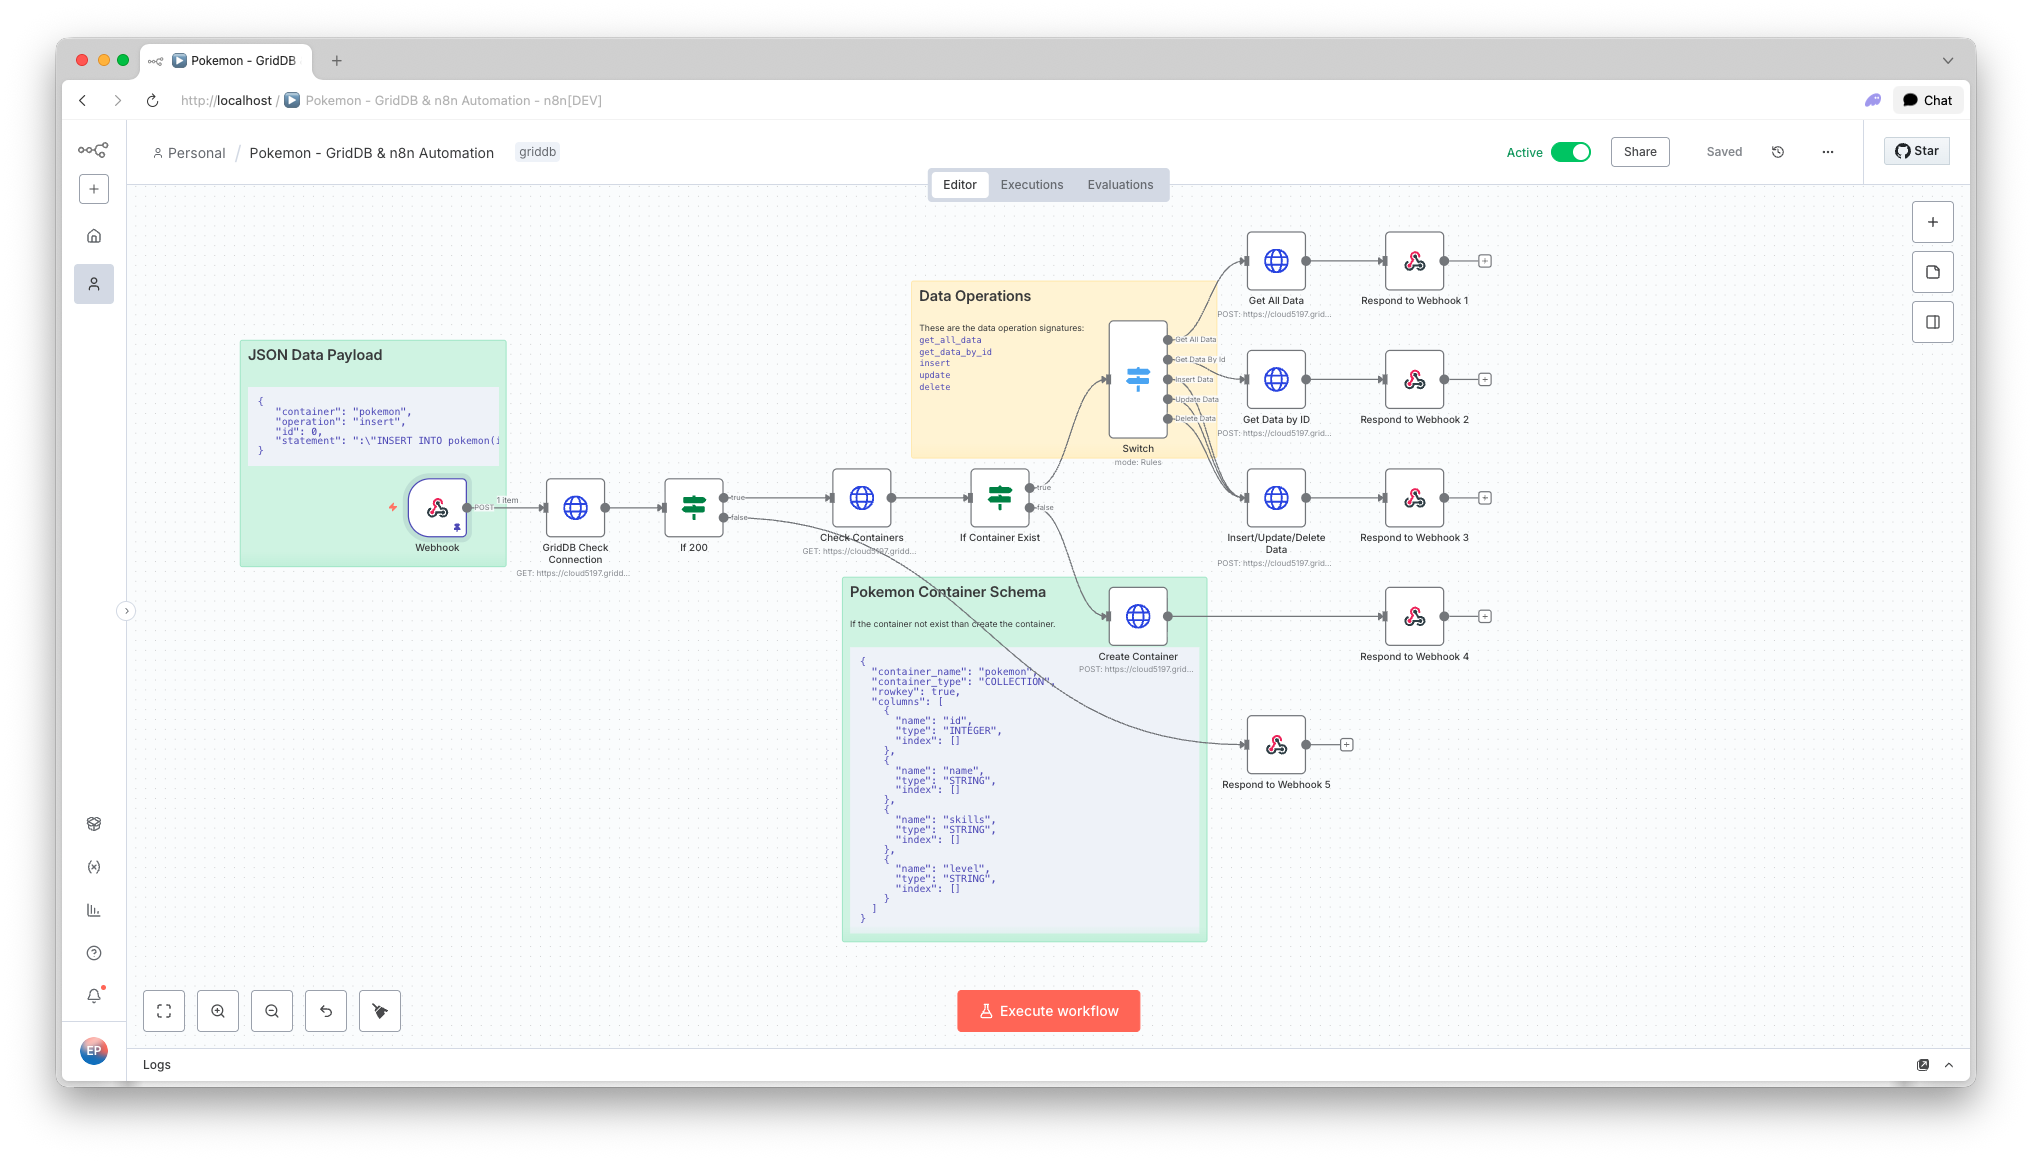
The full basic n8n workflow for our Pokémon app service can be accessed by using the webhook node. This webhook is basically an exposed or public URL that can be used by the client, and you also need to activate the workflow by clicking the Active toggle menu (top right).
Data Payload
Any user or client that uses n8n needs to send data with either this payload format:
$ {
$   "container": "container_name",
$   "operation": "data_operation",
$   "id": id_integer,
$   "statement": "SQLStatement"
$ }Fields:
- For the
get_all_dataoperation, the required fields arecontainerandoperation. - For the
get_data_by_idoperation, the required fields arecontainer,operation, andid. - For the
insert,update, anddeleteoperations, you need to add a TQL statement.
To grasp how the workflow works with data, please look into the tests below.
Workflow Tests
To test the n8n workflow, you can also use the curl command or other tools such as Postman. In this blog post, we use curl for portability and this webhook URL:
$ http://localhost:5678/webhook/35f92470-024d-49da-8c2f-63a2f212e639Get All Data Test
Use this command to get all data:
$ curl -i --location --request POST 'http://localhost:5678/webhook/35f92470-024d-49da-8c2f-63a2f212e639' --header 'Content-Type: application/json' --data "{\"container\":\"pokemon\",\"operation\":\"get_all_data\"}"Get Data by Id Test
To get specific data using its ID:
$ curl -i --location --request POST 'http://localhost:5678/webhook/35f92470-024d-49da-8c2f-63a2f212e639' --header 'Content-Type: application/json' --data "{\"container\":\"pokemon\", \"operation\":\"get_data_by_id\",\"id\":25}"Insert Data Test
To insert data:
$ curl -i --location --request POST 'http://localhost:5678/webhook/35f92470-024d-49da-8c2f-63a2f212e639' --header 'Content-Type: application/json' --data "{\"container\":\"pokemon\",\"operation\":\"insert\",\"statement\":\"INSERT INTO pokemon(id, name, skills, level) VALUES (26, 'Charmander', 'Flamethrower,Dragon Breath', 'Starter')\"}"Update Data Test
To update existing data, for example, a data with the id is 25:
$ curl -i --location --request POST 'http://localhost:5678/webhook/35f92470-024d-49da-8c2f-63a2f212e639' --header 'Content-Type: application/json' --data "{\"container\":\"pokemon\",\"operation\":\"update\",\"id\":25,\"statement\":\"UPDATE pokemon SET level = 'Master' WHERE id = 25\"}"Delete Data Test
To delete the data, use this curl command:
$ curl -i --location --request POST 'http://localhost:5678/webhook/35f92470-024d-49da-8c2f-63a2f212e639' --header 'Content-Type: application/json' --data "{\"container\":\"pokemon\", \"operation\":\"delete\",\"id\":26,\"statement\":\"DELETE FROM pokemon WHERE id = 26\"}Logs
n8n also provides Logs for every workflow execution. If something goes wrong, this is the best place to check which node is causing the error.