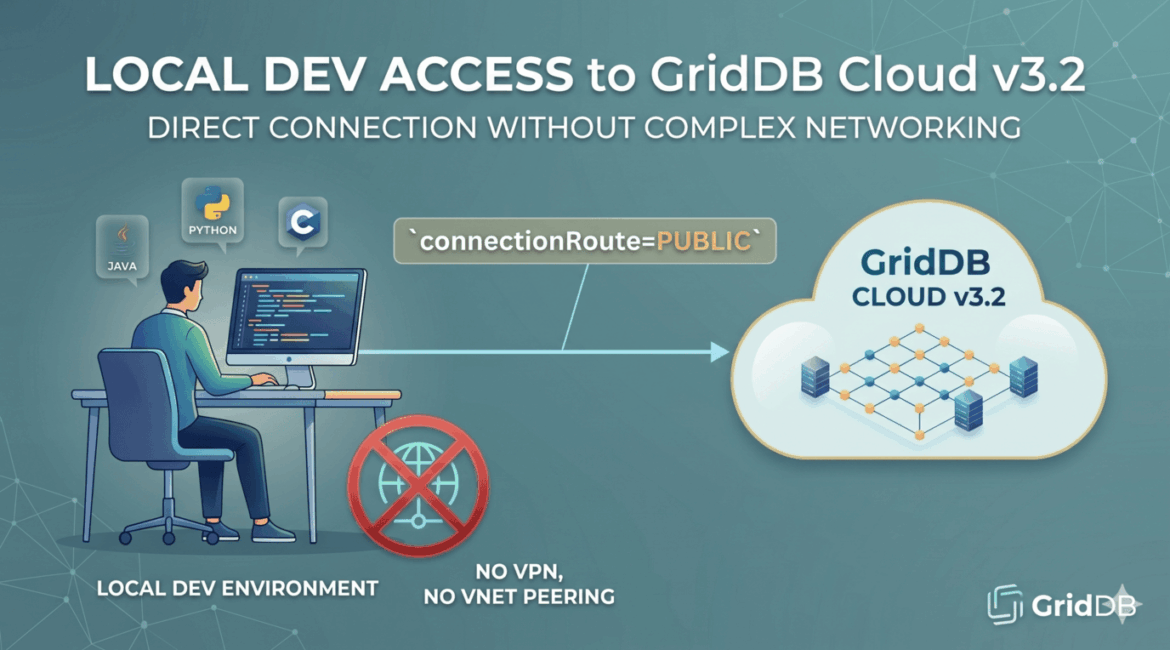
With the release of GridDB Cloud v3.2, we now get the ability to connect to GridDB Cloud from your local machine using the native NoSQL clients (Java, Python, etc.) — without having to spin up a VNet peering, without configuring a VPN, and without needing to use the Web API.
If you’ve followed along with our previous blogs covering the Azure Marketplace signup, the VNet peering setup, or the various Azure Connected Services integrations, you know that getting the native API working from outside the cloud used to be a bit tricky. You either had to host your code inside an Azure VNet peered to GridDB Cloud, set up a VPN to tunnel in, or resign yourself to the Web API. For local dev iteration, none of those options were super easy.
With v3.2, that changes. You can now point your local Python or Java client directly at your cloud instance over the public internet, authenticate, and run queries.
You can follow the official quick start guide but I will summarize and give some helpful tips that worked for me.
GridDB Cloud v3.2 is available via the Azure Marketplace. If you haven’t signed up yet, grab either the Pay-As-You-Go plan or the Fixed Monthly plan. Our Azure Marketplace signup blog walks through the whole process.
The Checklist
Here’s the short version of what you need to do, in order. I’ll go deeper on each step below.
First, we need to prepare our environment.
Preparation
- Generate your notification provider URL from the Cloud dashboard before whitelisting
- Whitelist your local machine’s IP in the GridDB access area
- Download the EE-only library jars from the Cloud help page (they’re not on Maven)
- Extract
gridstore-advanced.jarfrom the RPM if you’re not on Rocky Linux - Install the Python client
- Add all the jars — including
gridstore-advanced— to yourCLASSPATH - Append
connectionRoute=PUBLICto your connection details
That last one is the whole reason this works. Without it, the client tries to connect over the private route and will timeout.
1. Generate the Notification Provider URL (Do This First!)
Before you do anything else in the Cloud dashboard, head to the cluster settings and manually generate the notification provider URL.
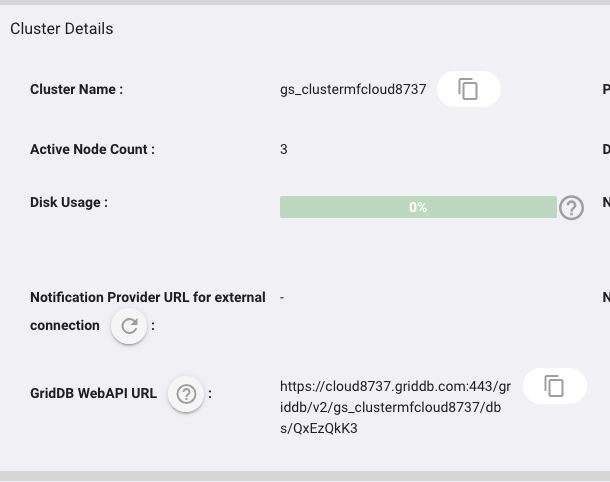
If you whitelist your IP first, it will fail with a strange warning.
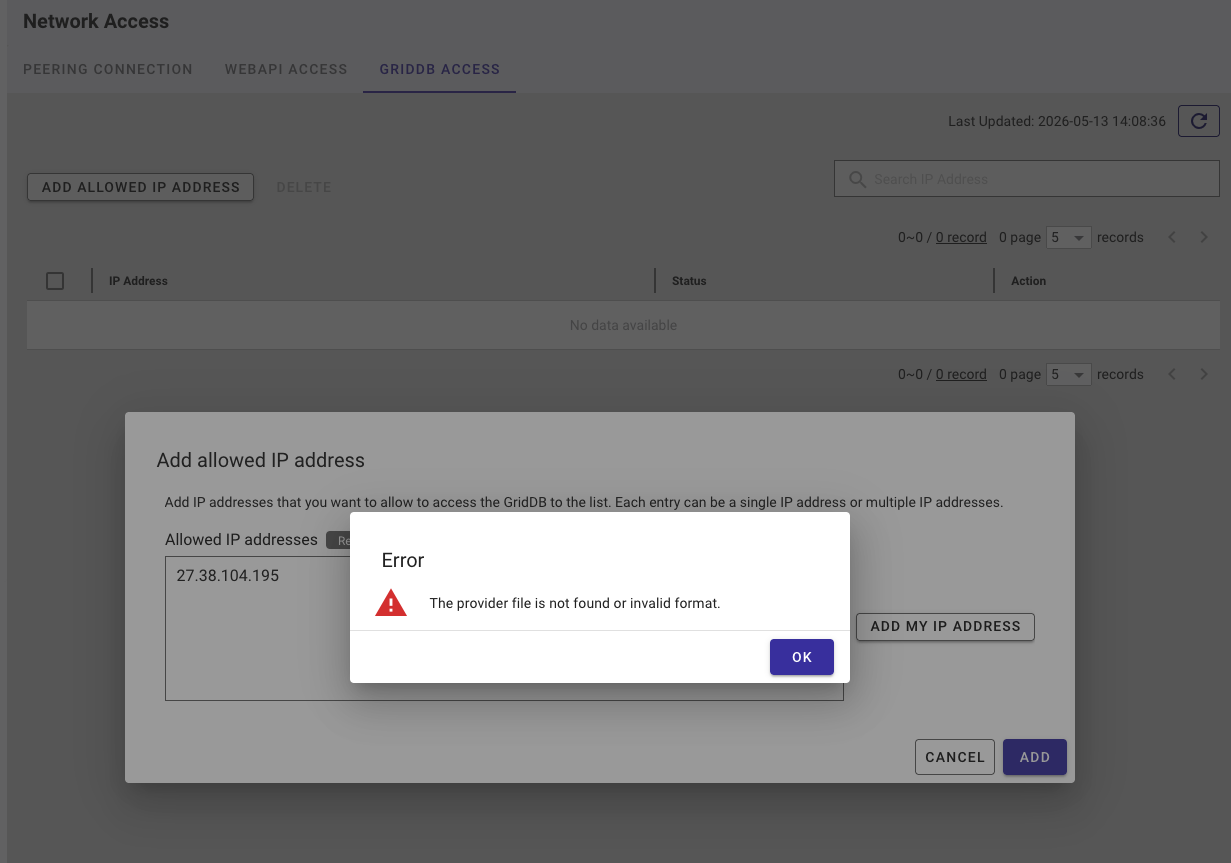
Save that URL somewhere — you’ll need it for your connection string.
2. Whitelist Your IP
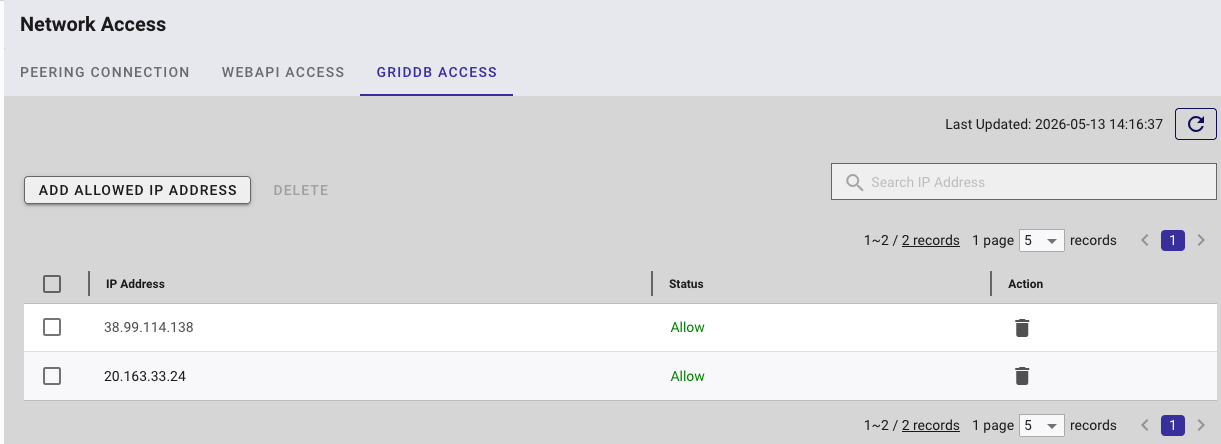
Now go to the access control area of the Cloud dashboard and add your local machine’s public IP to the whitelist. If you click ‘Add my IP’, it will automatically add your curren’t machine’s public IP Address.
3. Download the EE Library Files
Head into cloud dashboard’s help/downloads/support section and grab the Enterprise Edition library bundle labeled as: GridDB Cloud Library and Plugin download . These jars are not available on Maven Central or anywhere else — they ship exclusively with the EE build of GridDB, which is what the Cloud runs on. You need these to be able to make SSL connections to the cloud.
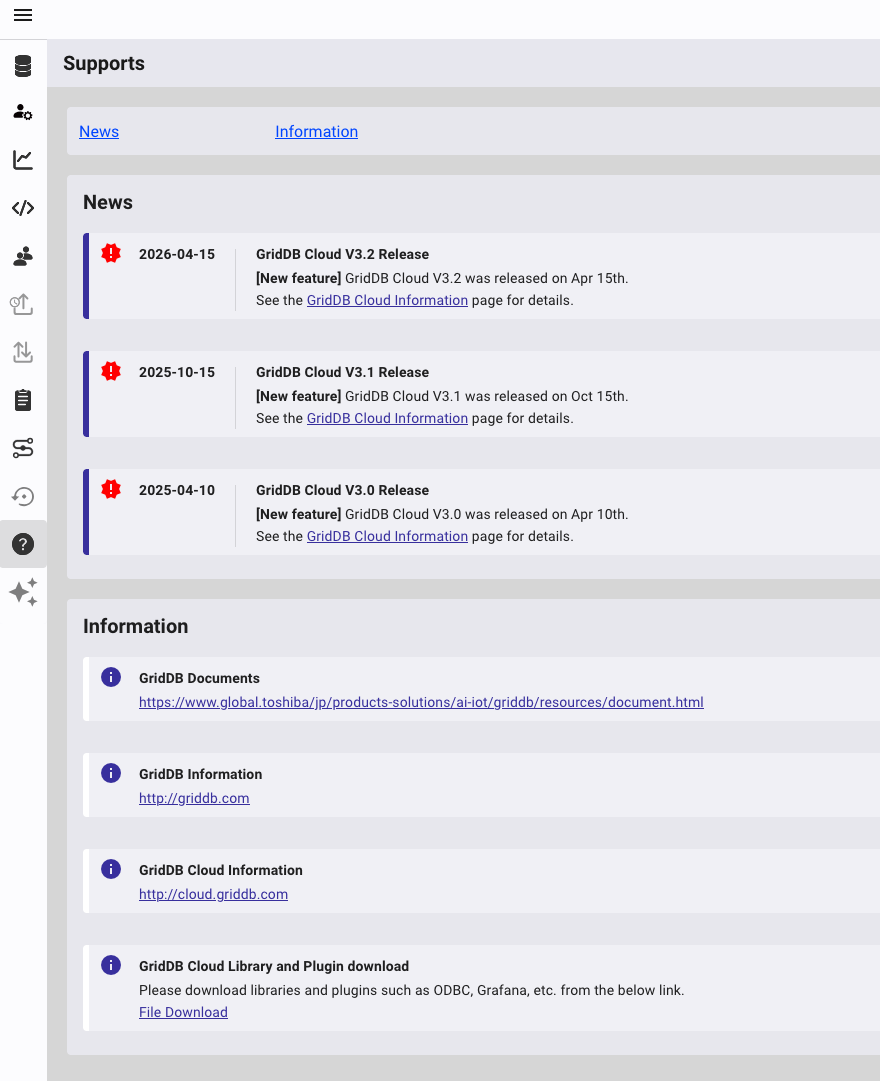
4. Extract gridstore-advanced.jar from the RPM
The EE download is distributed as an RPM. If you’re running Rocky Linux (or any RHEL-compatible distro), you can install it normally. But if you’re on Ubuntu, Debian, or pretty much anything else, you need to manually crack the RPM open to pull the jar out:
$ rpm2cpio griddb-ee-java-lib-5.9.0-linux.x86_64.rpm | cpio -idmv
This drops the contents into your current directory. The jar you want is gridstore-advanced.jar — it lives inside usr/share/java/ or similar after extraction. Without this jar on your classpath, your SSL handshake to the cloud will fail.
5. Install the Python Client
Standard Python client install — nothing new here. Follow the official Python client getting started guide for the full walkthrough (install Java, clone the python_client repo, mvn install, then pip install .).
6. Add Everything to CLASSPATH
Once you have all your jars in one place (gridstore.jar, gridstore-jdbc.jar, gridstore-arrow.jar, arrow-memory-netty.jar, and critically gridstore-advanced.jar), export your CLASSPATH:
$ export CLASSPATH=/path/to/lib/gridstore.jar:/path/to/lib/gridstore-jdbc.jar:/path/to/lib/gridstore-arrow.jar:/path/to/lib/arrow-memory-netty.jar:/path/to/lib/gridstore-advanced.jar
If gridstore-advanced.jar isn’t on this path, the connection will fail.
7. Add connectionRoute=PUBLIC
This is the magic parameter that tells the client to use the new public route introduced in v3.2. In your Python code, your factory config should include it:
self.gridstore = None
try:
    self.gridstore = GridDB.factory.get_store(
        notification_provider=self.notification_provider,
        cluster_name=self.cluster_name,
        username=self.username,
        password=self.password,
        database=self.database,
        connection_route='PUBLIC' #NOTE, PUBLIC must be in ALL CAPS
    )
    print(f"Successfully connected to {self.cluster_name}.")
except Exception as e:
    print(f"Failed to connect to GridDB: {e}")
Without this, the client will try to use the internal route and you’ll be stuck waiting.
Python Example
With all the pieces in place, here’s what a basic connect-and-query looks like from your local machine:
$ (venv) israel@griddb:~/development/griddb-university/python$ export CLASSPATH=$CLASSPATH:./gridstore.jar:./gridstore-arrow.jar:./arrow-memory-netty.jar:./gridstore-advanced.jar
$ (venv) israel@griddb:~/development/griddb-university/python$ export GRIDDB_NOTIFICATION_PROVIDER="URL"
$ export GRIDDB_CLUSTER_NAME="gs_clustermfcloud87"
$ export GRIDDB_USERNAME="admin"
$ export GRIDDB_PASSWORD="password"
$ export GRIDDB_DATABASE="nSt"
$ (venv) israel@griddb:~/development/griddb-university/python$ python3 main.py
$ JVM already started.
$ Attempting to connect to GridDB...
$ Successfully connected to gs_clustermfcloud8737.
$ Successfully created TimeSeries: SamplePython_timeseries1
$ Successfully put row into SamplePython_timeseries1: [datetime.datetime(2025, 10, 1, 15, 0, tzinfo=datetime.timezone.utc), 10.21]

$ --- Reading from SamplePython_timeseries1 ---
$ [datetime.datetime(2025, 10, 1, 15, 0), 10.21]
That’s it. No Azure Function wrapping, no container, no VPN client running in the background; just your script, talking directly to GridDB Cloud.
The full sample python source code along with Java sample code is included with this article.
Java from Your Local Machine
As java is the native interface for GridDB, let’s also take a look at connecting via Java.
The steps are largely the same, including the adding the new connectionRoute property and having the special library for making SSL requests to GridDB Cloud.
Gotcha #1: URL-encode the Notification Provider Value
When you pass the notification provider URL into Java’s GridStoreFactory, you need to URL-encode the value. If you don’t, Java’s property parser will see the &connectionRoute=PUBLIC portion as a separate parameter and silently drop it — and you’ll be left wondering why your connection is timing out even though everything looks right.
The fix is to encode the full URL before passing it in:
String notificationProvider = URLEncoder.encode(
    "https://<your-provider-url>?clusterName=<name>&connectionRoute=PUBLIC",
    StandardCharsets.UTF_8.toString()
);
Gotcha #2: Manually Install gridstore-advanced.jar to Your Local Maven Repo
Same jar as before, same reason — not on Maven Central. To use it with Maven, you have to install it to your local .m2 repository manually:
$ mvn install:install-file \
$     -Dfile=/path/to/your/python/gridstore-advanced.jar \
$     -DgroupId=com.github.griddb \
$     -DartifactId=gridstore-advanced \
$     -Dversion=5.9.0 \
$     -Dpackaging=jar
Then add it as a dependency in your pom.xml:
<dependency>
    <groupId>com.github.griddb</groupId>
    <artifactId>gridstore-advanced</artifactId>
    <version>5.9.0</version>
</dependency>
Now Maven will resolve it like any other dependency when you build your project.
Java Example
$ (venv) israel@griddb:~/development/griddb-university/java$ java -jar target/java-samples-1.0-SNAPSHOT-jar-with-dependencies.jar
$ jdbc:gs:///gs_clustermfcloud8737/nl7QftSt?notificationProvider=https%3A%2F%2Fdbaasshare&connectionRoute=PUBLIC
$ CREATE TABLE IF NOT EXISTS exampleJdbc (id integer, value string);
$ INSERT INTO exampleJdbc values  (0, 'test0'),(1, 'test1'),(2, 'test2'),(3, 'test3'),(4, 'test4')
$ SELECT * FROM exampleJdbc
$ id	value	0	test0	1	test1	2	test2	3	test3	4	test4	0	test0	1	test1	2	test2	3	test3	4	test4
$ Running SQL: SELECT ts, AVG(temp) as avg_temp FROM device WHERE ts BETWEEN TIMESTAMP('2020-07-12T00:01:20Z') AND TIMESTAMP('2020-07-12T00:14:00Z') GROUP BY RANGE (ts) EVERY(20, SECOND)
$ java.sql.SQLException: [280005:SQL_DDL_TABLE_NOT_EXISTS] Parse SQL failed, reason = GET TABLE failed. (reason=GET TABLE failed. (reason=Specified table 'device' is not found)) on executing query (sql="SELECT ts, AVG(temp) as avg_temp FROM device WHERE ts BETWEEN TIMESTAMP('2020-07-12T00:01:20Z') AND TIMESTAMP('2020-07-12T00:14:00Z') GROUP BY RANGE (ts) EVERY(20, SECOND) ") (db='nl7QftSt') (user='S01K7vrCuF-israel') (clientId='c761d357-ec46-4e5c-8f80-405e69635810:4') (source={clientId=155, address=172.22.5.69:46422}) (connection=PUBLIC) (address=20.205.145.126:20001, partitionId=8289)
$ Testing GridDB NoSQL
$ Creating Container
And again, the sample code will be shared here. In this case, we are connecting to GridDB Cloud via the NoSQL interface AND the SQL interface through JDBC. Both work here once the above steps are adhered to.
C Client
Please note, that if you would like to use the C Client, you will also need to follow the same procedure as the Java code but for the C Client. That is, you will need to include the ‘public route’ to your connection details and will need to extract the .rpm called griddb-ee-c-lib-5.8.0-linux.x86_64.rpm (assuming you are not using CentOS/Rocky Linux) and grab the library files libgridstore.so.0.0.0 and libgridstore_advanced.so.0.0.0 and the header (gridstore.h).
Once you have those in place, add the public route to your connection details
const GSPropertyEntry props[] = {
    { "notificationProvider", "https://<url-encoded-provider-url>" },
    { "clusterName",          "<your cluster name>" },
    { "database",             "public" },
    { "user",                 "<user>" },
    { "password",             "<password>" },
    { "sslMode",              "PREFERRED" },
    { "connectionRoute",      "PUBLIC" }
};
And you should be good to go for the C Client as well!
Conclusion
Being able to hit GridDB Cloud directly from your local dev machine is a genuinely big deal for iteration speed.
If you haven’t signed up for GridDB Cloud v3.2 yet, it’s exclusively on the Azure Marketplace — you can grab the Pay-As-You-Go plan here.